Some Assembly Required
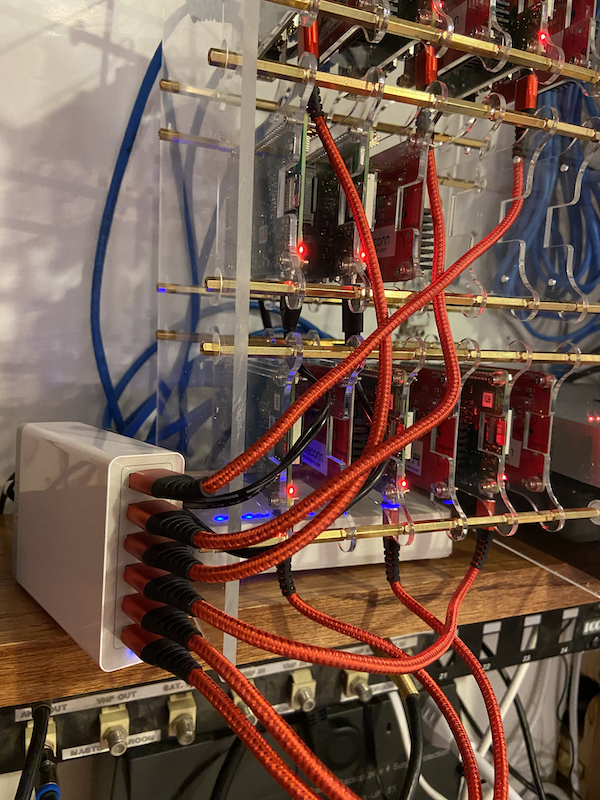
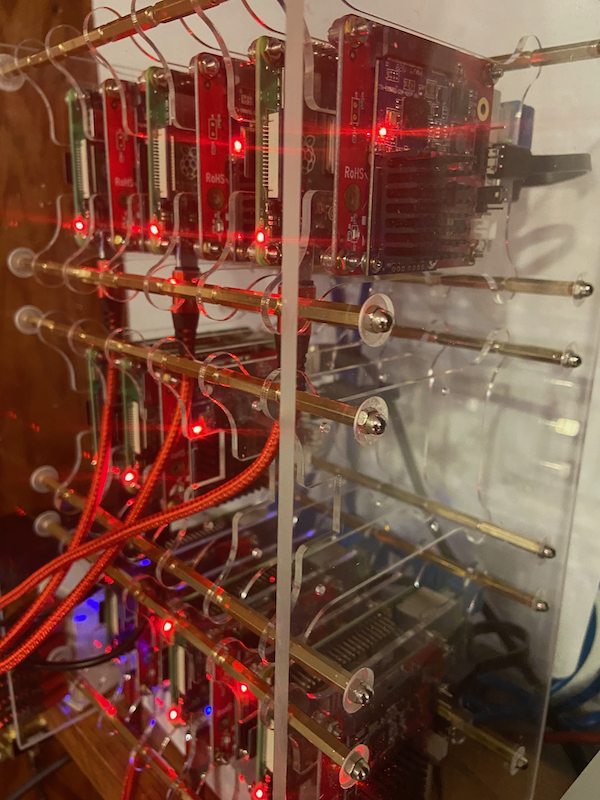
This is the first in a series of articles I am writing to tell you the story of how I built a small data center out of Raspberry Pis. We will uncover the struggles I overcame, along with the triumphs, I enjoyed throughout the process. Pictured below is the end result.
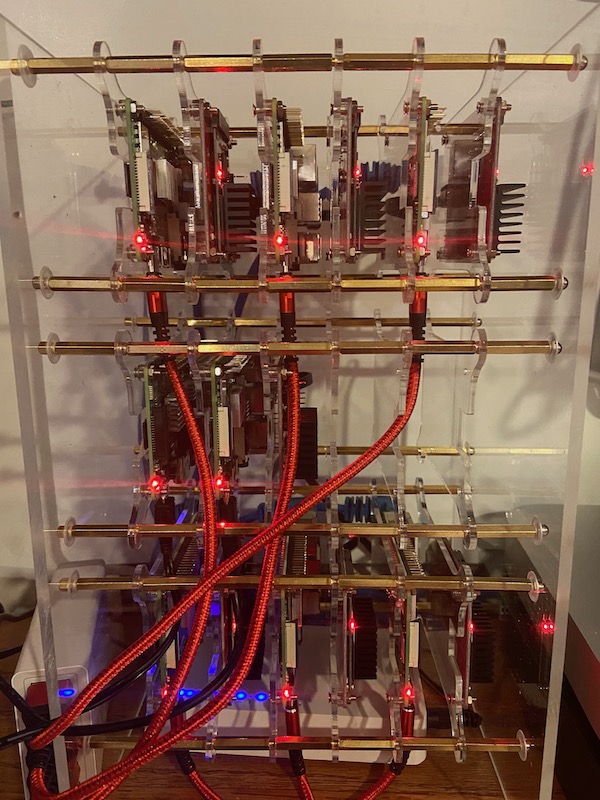
The bottom row contains three Raspberry Pi 4 K3s master nodes. The top row contains three Raspberry Pi K3s agent nodes. The middle row has a Raspberry Pi 3b that I plan to use to monitor my APC battery backup. Next to it is another Raspberry Pi 4 that I’m using for remote access. I’m using Dataplicity to share access with a few friends.
Covered in this post:
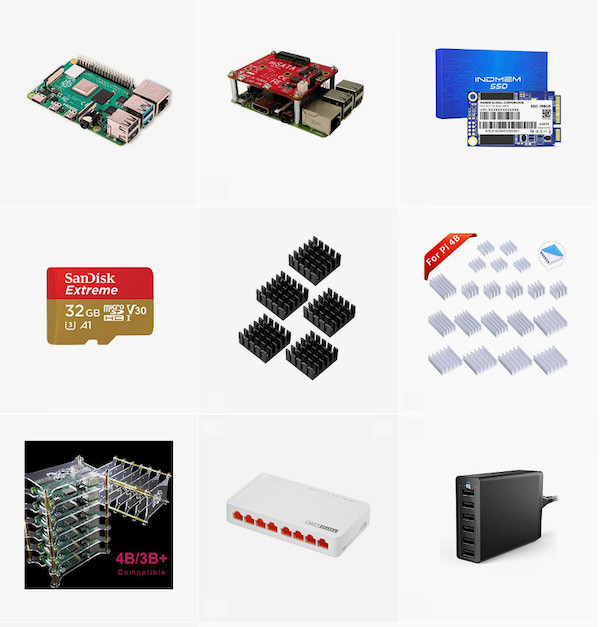
- Components - What parts did I use in my cluster?
- Memory - How much memory should you buy?
- Storage - Should you use Micro-SATA or MicroSD?
- Power - What about incompatible power cords?
- Cooling - Is passive cooling enough?
- Assembly - What are the assembly options?
Components
You can see there was some assembly required.
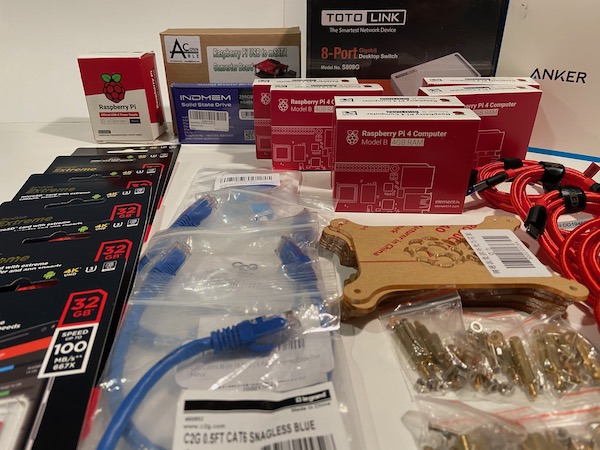
You can find the parts I used on my public shopping list at Amazon. Click the image below to open the shopping list page.
In addition, I ordered clear acrylic plexiglass to connect the cluster mounts together. I ordered the 3/16” thickness, but I should have ordered the next thinner size to match the thickness of the tower case.
Memory
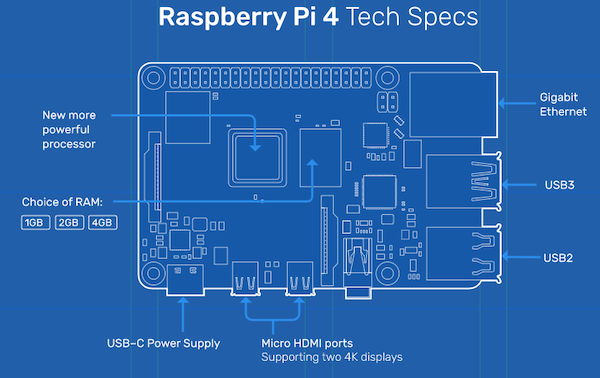
The new Raspberry Pi 4 is powerful enough to replace a simple desktop computer given its up to 4gb of memory, high-speed USB-3 connectors, 2 4k micro HDMI ports, gigabit Ethernet, and four ARM processing cores.
My cluster runs Rancher K3s Kubernetes. The K3s hardware requirements are:
- RAM - 512mb minimum (Pi 4 has up to 4gb LPDDR4-2400 SDRAM)
- CPU - 1 minimum (Pi 4 has a Broadcom BCM2711, Quad-core Cortex-A72 64-bit 1.5GHz CPU)
- Disks - SSD recommend (Pi 4 has two USB 3 ports to attach mSATA )
The only option you have when ordering a Raspberry Pi 4 is the amount of memory. Get the model with 4gb of RAM. It’s really not a choice if you want to take full advantage of Kubernetes.
Storage
I bought Micro SATA extensions for my Raspberry Pis. If you decide to use mSATA, then you can buy an inexpensive 8gb microSD card since all the work will happen on the mSATA drive. If you don’t add mSATA, then buy a MicroSD suitably sized for your needs. Pay a little extra for a high-speed card from a well-known manufacturer, like SanDisk.
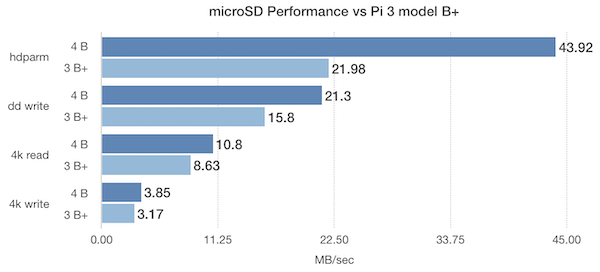
Why should you pay for an mSATA drive with a USB-C adapter? The performance of the mSATA drive is better than the MicroSD. The chart below shows performance tests done by Jeff Geerling in his blog post, Pi MicroSD Card Performance Comparisons, 2019, July 19, 2019. Jeff measured hdparm of 43.92 using the microSD card vs 345.41 using a USB3 SSD.
I added 256gb mSATA drives to all the Raspberry Pis in my cluster. That’s overkill, but since I want to fully enjoy playing on my Raspberry Pi playground, I spent the extra money.
I updated my public list to include a Kingston SSD instead of the INDMEM SSD. I will test it when I add my next Pi.
Power
If you buy an official Raspberry Pi power supply you can ignore this section. If you have a lot of Raspberry Pis in your cluster you can save space by using an Anker 6-Port USB Charging Station, but be careful ordering the cables.
Raspberry Pis had a bug in its USB-C connector, causing some USB-C cables to not work with the Raspberry Pi 4. This was corrected in the Raspberry Pi 4B V1.2. If you have an early version, choose one from those reviewed on Top’s Hardware. I did, and they work fine. Keep your shipping material slips handy, in case you buy an incompatible cable.
Cooling
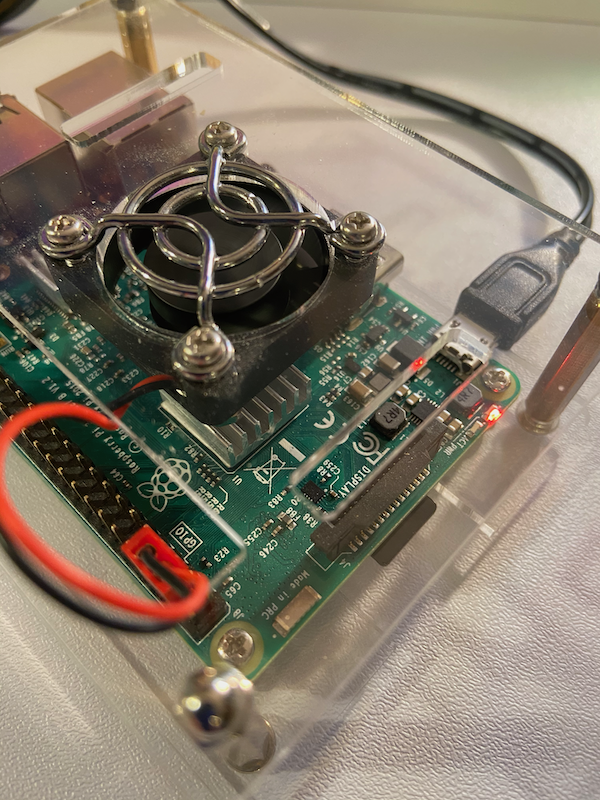
Nobody likes listening to fans. I have a Raspberry Pi 3 with a variable speed fan that can get quite loud.
The sound generated by six or eight fans would be too much noise for me. You can find lots of information about cooling Raspberry Pis. This video on Raspberry Pi 3 cooling is very thorough.
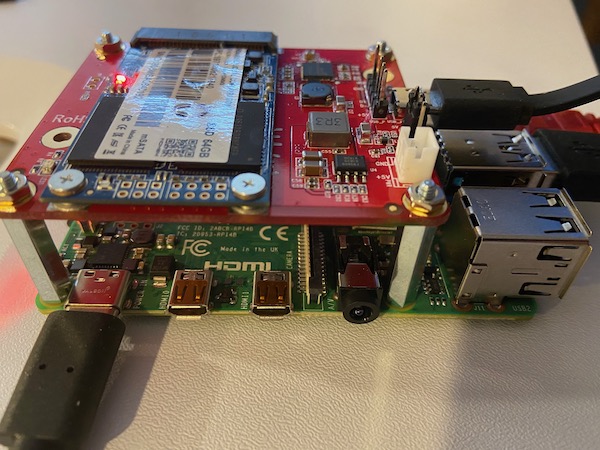
The Yahboom 6-Layers Acrylic Cluster Case I use is completely open, so passive cooling is fine. The only problem is that the mSATA daughterboard assembly is too tall to fit in the bay. You can get around this if you mount the daughterboard in a separate bay above or below the Raspberry Pi, as shown here.
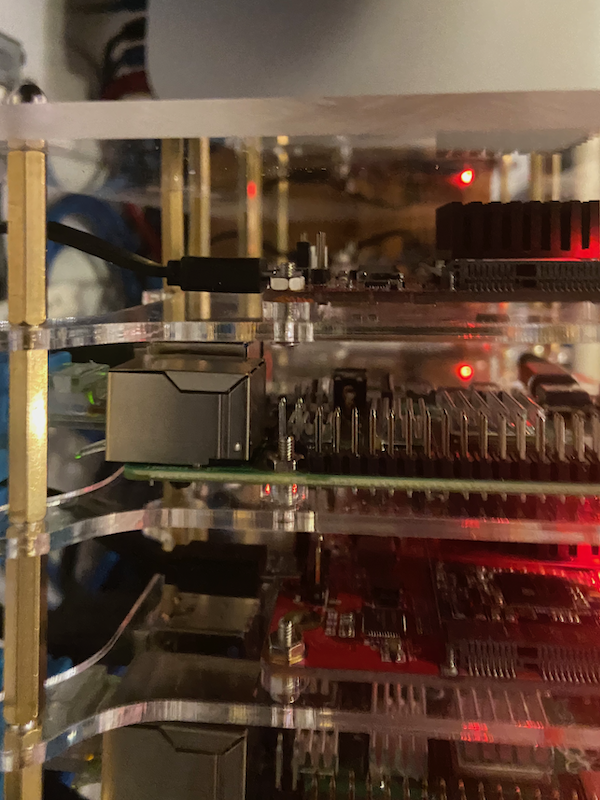
Notice the silver heatsinks on the Raspberry Pi as well as the large black heatsink on the mSATA card.
If you have multiple columns of Raspberry Pis you should alternate putting the mSATA drive above or below the Raspberry Pi from one column to the next. If the Raspberry Pis are not across from each other routing the power cable past the adjacent Raspberry Pi can be tight. If you stagger the mounting so there is a Micro SATA drive next to each Raspberry Pi, then routing the power cable is no problem.
Assembly
Once you decide what size MicroSD and mSATA cards to order and pick out a cluster case you like, it is time to assemble everything.
In this side view, you can see the insets I drilled in the acrylic side panel to expose enough threads to attach the acorn nuts. This was necessary because I ordered the 3/16” thickness. I recommend you pick something similar in thickness to the acrylic pieces of cluster case, like 1/8”, so you don’t have this problem.
Finish your mechanical installation of the cluster parts and we’ll pick-up with the software installation in the next article, Installing Raspian and Kubernetes.
I’m so happy I work at Ahead. Ahead encourages this kind of experimentation. If you want to learn about opportunities at Ahead, please reach out to my buddy, Kaleigh, to find out what positions are open or drop her your resume.
Next
In the next installment of the series, How to Configure Raspbian, I detail the set-up of Raspbian, booting off of SSD.
References
- https://blog.alexellis.io/cooling-off-your-rpi4
- https://www.hackster.io/news/do-you-need-to-use-a-fan-for-cooling-with-the-new-raspberry-pi-4-6d523ca12453
- https://www.seeedstudio.com/blog/2019/09/18/raspberry-pi-4-cooling-test-compare-heat-sinks-and-cooling-fan
- https://projects.raspberrypi.org/en/projects/raspberry-pi-setting-up
- https://jamesachambers.com/raspberry-pi-cheap-ssd-upgrade-30
- https://www.element14.com/community/community/raspberry-pi/blog/2019/08/30/quick-sd-to-ssd-on-the-pi-4
- https://jamesachambers.com/raspberry-pi-4-usb-boot-config-guide-for-ssd-flash-drives