How to Centralize Logs
Whoops, I did it again! I lost access to my primary node, but I don’t know why because the logs aren’t accessible. I need centralize logging outside of the cluster.
What OS are you using, AMD32 Raspbian or AMD64 Ubuntu? I was not able to get cloud logging working on 32-bit Raspbian, but it worked fine with 64-bit Ubuntu!
This post covers two options:
- Cloud logging for AMD64 Ubuntu.
- Rsyslog logging for AMD32 Rasbian
Cloud Logging for AMD64 Ubuntu
With Ubuntu installed, cloud logging becomes a practical option because most logging agents have a build for AMD64.
Solarwinds Loggly
Loggly works perfectly on AMD32 Raspbiean or AMD64 Ubuntu. I chose not to continue with it because the least expensive month-to-month subscription is $99/month.

Google Cloud Platform Logging
You can send on-premise logs to GCP using Fluentd, and it is possible to run Fuentd on a 32-bit Raspbian, but I was unable to send logs to GCP with 32-bit Fluentd. This article is an example of sending 32-bit Raspbian logs to Treasure Data, a very pricy service: Raspberry Pi Cloud Data Logger. Nevertheless, I couldn’t get it to work with GCP on 32-bit Raspbian. I’ve used GCP logging at work in the past, and it works well, but this time I decided to try AWS.
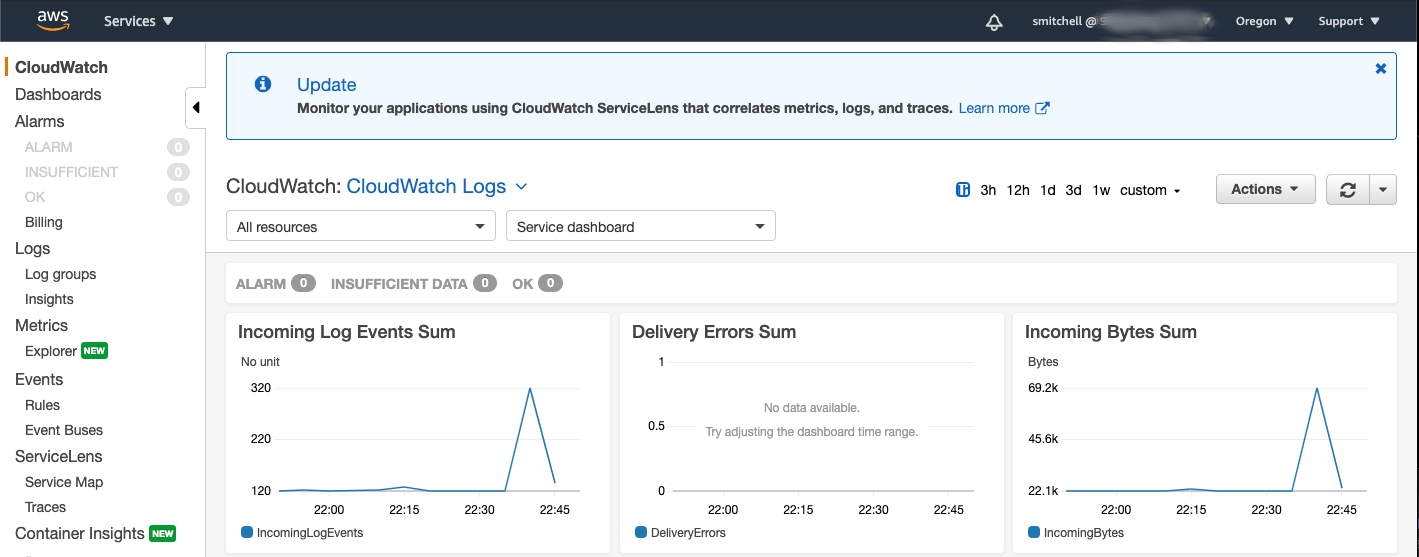
Centralized Logging with AWS CloudWatch
AWS CloudWatch is easy to set up on the server-side. There is a 32-bit compatible agent, too, collectd, that sends metrics to CloudWatch. The collectd agent is from AWSLabs and is written in Python, making it portable to 32-bit Raspbian.
Unfortunately, the only CloudWatch Logging Agent ARM package for Debian is for AMD64. Raspbian is armhf, so the agent doesn’t work with 32-bit Raspbian. Fortunately, it does work with AMD64 Ubuntu which I just installed!
Installing the CloudWatch Agent on On-Premises Servers
Follow the AWS CloudWatch instructions for on-premise servers. I chose to use IAM Roles and Users with the CloudAgent.
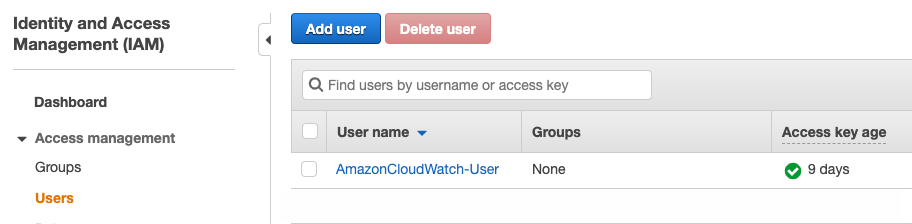
Create a CloudWatch Agent user.
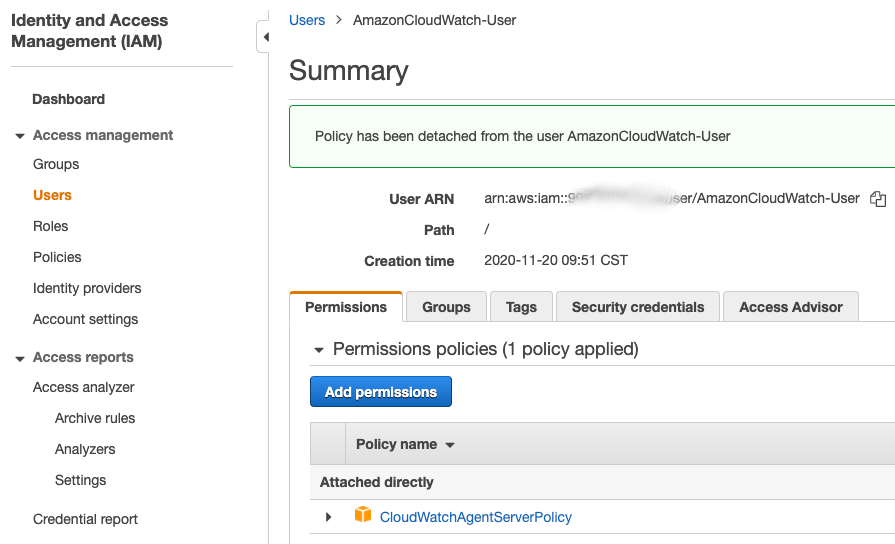
Assign the CloudWatch Log policy
Install the AWS CLI
Install the AWS CLI on all the nodes to run the CloudWatch Agent. I used the iTerm broadcast feature to update all my nodes at once.
1
sudo apt install awscli -y
Check the version to verify the installation.

Configure the AWS CLI
After multiple attempts, and a lot of frustration, I switched to the root user, “sudo bash,” to get CloudWatch to work. Long story short, “aws configure” creates the file /home/ubuntu/.aws/credentials, but try as I might, I could not prevent the CloudWatch agent from looking for the credentials in /root/.aws/credentials. Finally, I gave up and started over, using “sudo bash.”
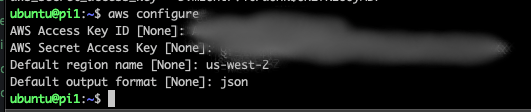
Run the configure command to create the .awd/credentials file using the CloudWatch user created above.
1
aws configure
Install the CloudWatch Agent
Download and install the CloudWatch agent for your operating system: Cloud Watch Agent Downloads.
1
2
wget https://s3.amazonaws.com/amazoncloudwatch-agent/ubuntu/arm64/latest/amazon-cloudwatch-agent.deb
sudo dpkg -i -E ./amazon-cloudwatch-agent.deb

Create a file named AmazonCloudWatchAgent with the CloudWatch agent credentials. Again, I used the iTerm broadcast feature to update all my nodes at once.
1
2
3
4
5
6
cat <<EOF > AmazonCloudWatchAgent
[profile AmazonCloudWatchAgent]
aws_access_key_id=*******************
aws_secret_access_key=**************************************
region = us-west-2
EOF
Pass the agent configuration to the AWS CLI.
1
sudo aws configure --profile AmazonCloudWatchAgent
Technically, this step probably isn’t necessary. The Ubuntu Groovy Gorilla OS for the Raspberry Pi installs AWS CLI version 1, and I think the Profiles feature (e.g. “AmazonCloudWatchAgent”), is only supported in AWS CLI version 2.
Install Collectd (optional)
If you want to send Collectd metrics install it.
1
sudo apt-get update && sudo apt-get install collectd
Run the CloudWatch Wizard
Use the CloudWatch Wizard to generate a configuration file. It is generated at /opt/aws/amazon-cloudwatch-agent/bin/config.json.
1
sudo /opt/aws/amazon-cloudwatch-agent/bin/amazon-cloudwatch-agent-config-wizard
Have a look at Amazon’s CloudWatch Config Wizard documentation for the details. I generated multiple configurations until I had what I wanted. In my home-lab YAML repository is a copy of my current CloudWatch config file. It will evolve over time. I’m just experimenting now.
Start the CloudWatch Agent
Launch the CloudWatch agent. As noted above, I was only able to get this to work from “sudo bash.”
1
/opt/aws/amazon-cloudwatch-agent/bin/amazon-cloudwatch-agent-ctl -a fetch-config -m onPremise -s -c file:/opt/aws/amazon-cloudwatch-agent/bin/config.json
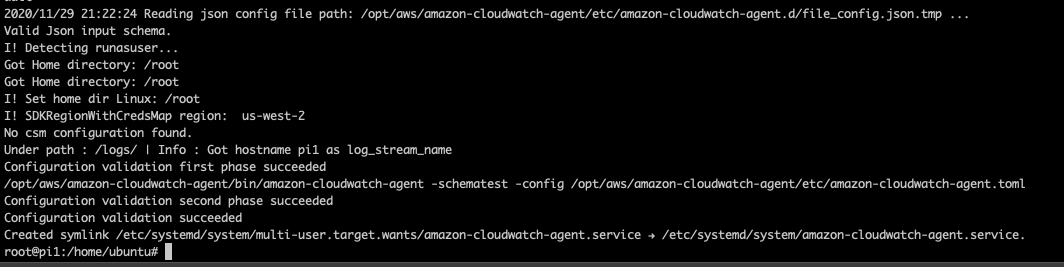
Congratulations! The CloudWatch agent is running. In a few minutes, you will start receiving logs on AWS CloudWatch.
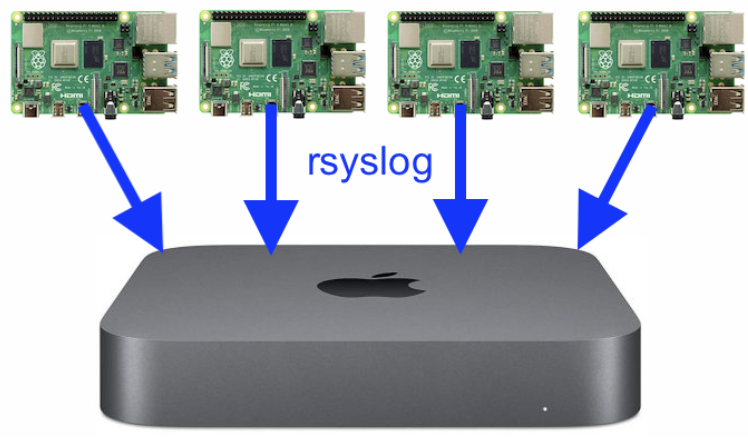
Rsyslog for AMD32 Raspbian
If you are running 32-bit Rasbian, centralized cloud logging isn’t in the cards for you. The next best thing is rsyslog to a server outside of the cluster.
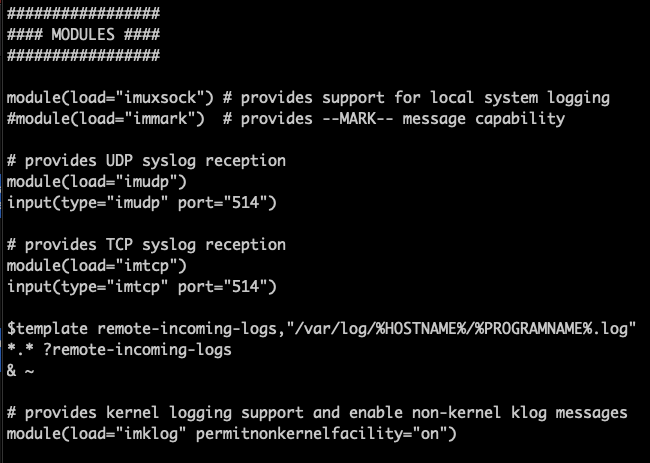
Here is the blog that I followed to configure Rsyslog: How to Configure Rsyslog Centralized Log Server on Ubuntu 18.04 LTS Rsyslog Server.
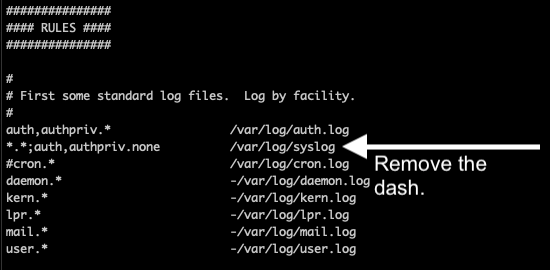
First, you uncomment the udp and tcp port binding lines in the /etc/rsyslog.conf file. Next, you add a template for writing the remote incoming logs. See the post referenced above for all the details.
Rsyslog Client Setup
Add the configuration for the remote Rsyslog server to the /etc/rsyslog.conf file on all the Raspberry Pi nodes. Again, see the post referenced above for the details.
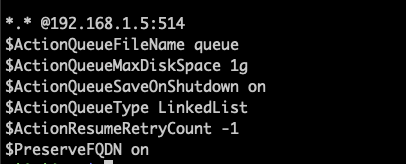
Also, the syslog is excluded by default. I’m sure a Linux admin knows a good reason for that, but for my home lab I need the logs. In order to send syslog you need to remove the dash in front of it.
Finally, the instructions I followed above are for Ubuntu, so the command to restart rsyslog won’t work on Raspbian. Use this command instead.
1
sudo service rsyslog restart
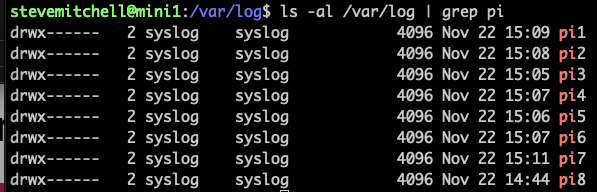
After restarting Rsyslog on all the Raspberry Pis, you should see directories matching the Pi hostnames appear on the Rsyslog server in the /var/log directory, as shown below:
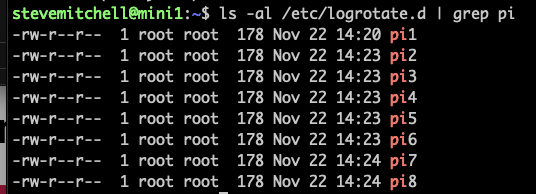
Defining Log Rotation
Add log rotation rules to avoid filling up the hard disk. This is done with configuration files in the /etc/logrotate.d/ directory.
Each configuration file looks something like this.
1
2
3
4
5
6
7
8
9
10
/var/log/pi1/*.log {
        weekly
        missingok
        dateext
        rotate 3
        size=10M
        create 0644 root root
        notifempty
        sharedscripts
}
That’s all there is to it. When I figure out how to get cloud logging working with Azure, GCP, or AWS, I will add a new logging post.