How NOT to Home Lab
I learned how not to build a home lab, at least in my case. I decided to avoid small machines and go with big, multiprocessor machines with a fast hypervisor (type-1), that is, because I wasn’t enjoying tinkering with my Raspberry Pis anymore.
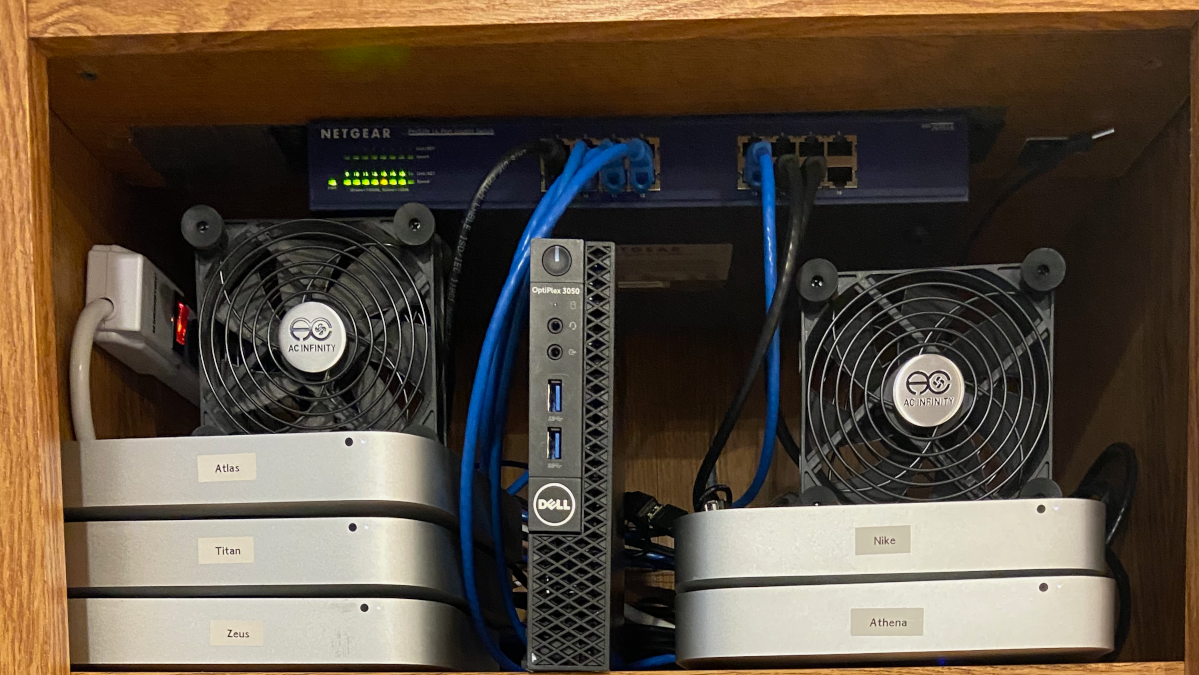
In 2020, I built a bare-metal home lab consisting of a Raspberry Pi K3S Kubernetes cluster and a cluster of Mac Minis. Running Kubernetes on Raspberry Pis was fun, but eventually, I needed more clusters running different Kubernetes distributions. The problem with bare metal is that it is inflexible and can get expensive over time. It was time to re-think my home lab strategy.
There are lots of ways to “home lab” when it comes to Kubernetes. The quickest way to get started is using your desktop/laptop and any of these tools:
- Docker Engine - Docker for the desktop with built-in Kubernetes.
- K3S - Lightweight Rancher distribution.
- Kind (Kubernetes in Docker)
- Micro8s - Lightway Canonical distribution.
- Minikube - A community version of Kubernetes for learning.
- MiniShift - A fork of MiniKube for running OpenShift.
- Rancher Desktop - Rancher Desktop is an alternative to Docker Engine that runs K3S.
- Tanzu Community Edition - Tanzu Kubernetes Engine that runs on Kind.
- For virtualization there is Vagrant, VirtualBox, VMware Fusion, VMware Workstation, and more.
Desktop containerization/virtualization is the simplest, least costly option for learning at home. You can stop reading here if some combination of these desktop tools satisfies your home lab needs.
What if you need more? Do you go Cloud or on-premises? That depends on your requirements.
Cloud
If you want to spin up short-lived clusters in the Cloud to avoid costs, I recommend using Terraform and Ansible for IaC (Infrastructure as Code). IoC lets you create and destroy Kubernetes clusters on a whim. As an application developer, I don’t have to use Terraform and Ansible much at work, but I use them in my lab.
On-premises
If you need long-lived K8S clusters, for instance, to run home automation with Home Assistant, you should find a multi-core, high-memory machine to do virtualization. I bought a used, dual-Xeon machine with 64 GB of RAM for cheap.
Hypervisors
There are two types of hypervisor to do virtualization: type-1 or type-2.
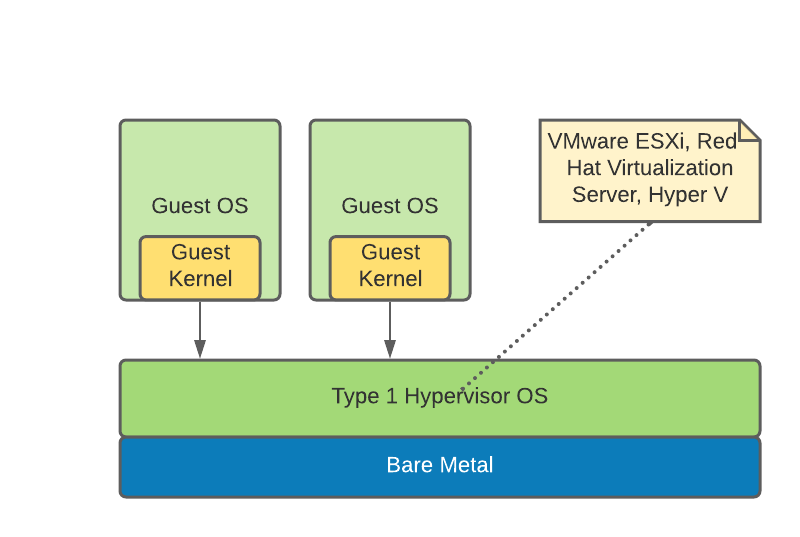
Type-1 Hypervisors
Type-1 hypervisors run directly on bare metal and offer the best performance. Examples of type-1 hypervisors are VMware ESXi, Red Hat Virtualization Server, Microsoft Hyper V, and Citrix Xen. Open source Xen was a popular type-1 hypervisor in the early days of virtualization. KMS has largely supplanted Xen. Other than open-source Xen, the rest are commercial products, so you’ll need to determine the product licensing. For example, if you buy the VMware User Group Advantage membership for $200/year, you can access all the VMware enterprise products (with use restrictions).
The illustration below shows that with type-1, the hypervisor and OS are the same.
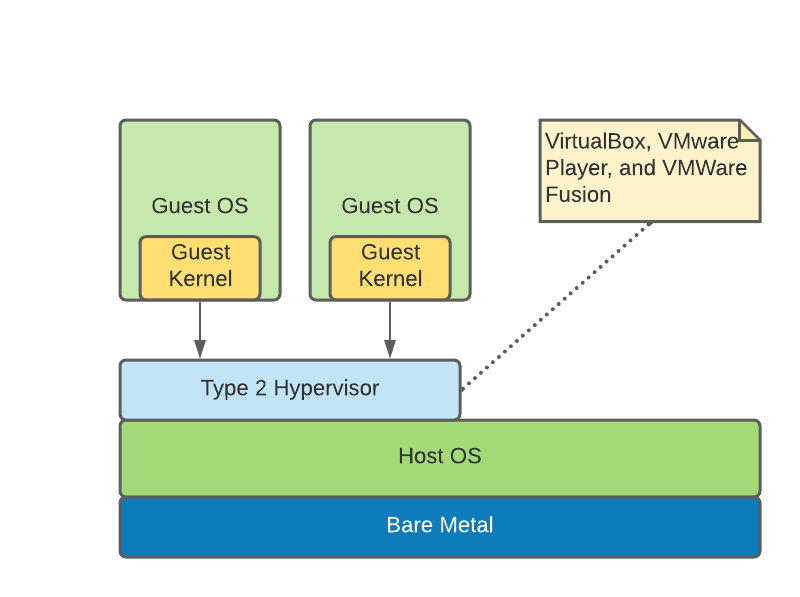
Type-2 Hypervisors
There are many open-source type-2 hypervisors available for your home lab, but they are slower since they run on top of the OS. You typically don’t see companies run VirtualBox, a type-2 hypervisor, in production because of its slow performance, but it is well suited for home lab applications.
Other type-2 hypervisors include VMware Workstation/Fusion/Player and Microsoft Virtual PC. VirtualBox seems to be the most popular, with lots of prebuilt images available online.
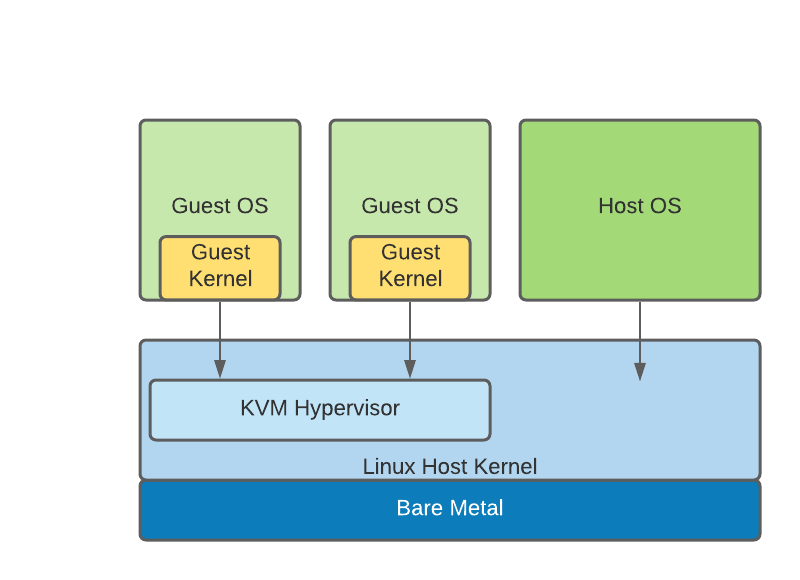
KVM Hypervisor
Then there is the KVM hypervisor, which is a mix of type-1 and type-2 hypervisors. KVM is nearly as fast as a type-1 hypervisor because it is built into the Linux kernel. Proxmox, Virt-Manager, and Cockpit are GUIs you can run on top of KVM.
As you can see in the illustration below, the guest OSs have direct access to the KVM hypervisor. The overhead is as little as 5%. It also has an extensive CLI, so it is well suited for automation with tools like Terraform.
Choosing an On-premises Hypervisor
If the purpose of your lab is to help you in your current job, and you work for a company that runs VMware, Microsoft, Citrix, or Red Hat virtualization products, you should build something that mirrors your work environment.
You will have to deal with licensing, though. As I mentioned, if you buy the VMUG Advantage membership, you get access to all the VMware products for $200/year. Please see the VMware compatibility matrix to find the proper hardware.
If you don’t need a commercial hypervisor for work, you should use Proxmox or KVM. Proxmox has a built-in GUI, or if you go with native KVM, and don’t want to use the KVM CLI, you can add the Virt-Manager or Cockpit GUI on top of KVM.
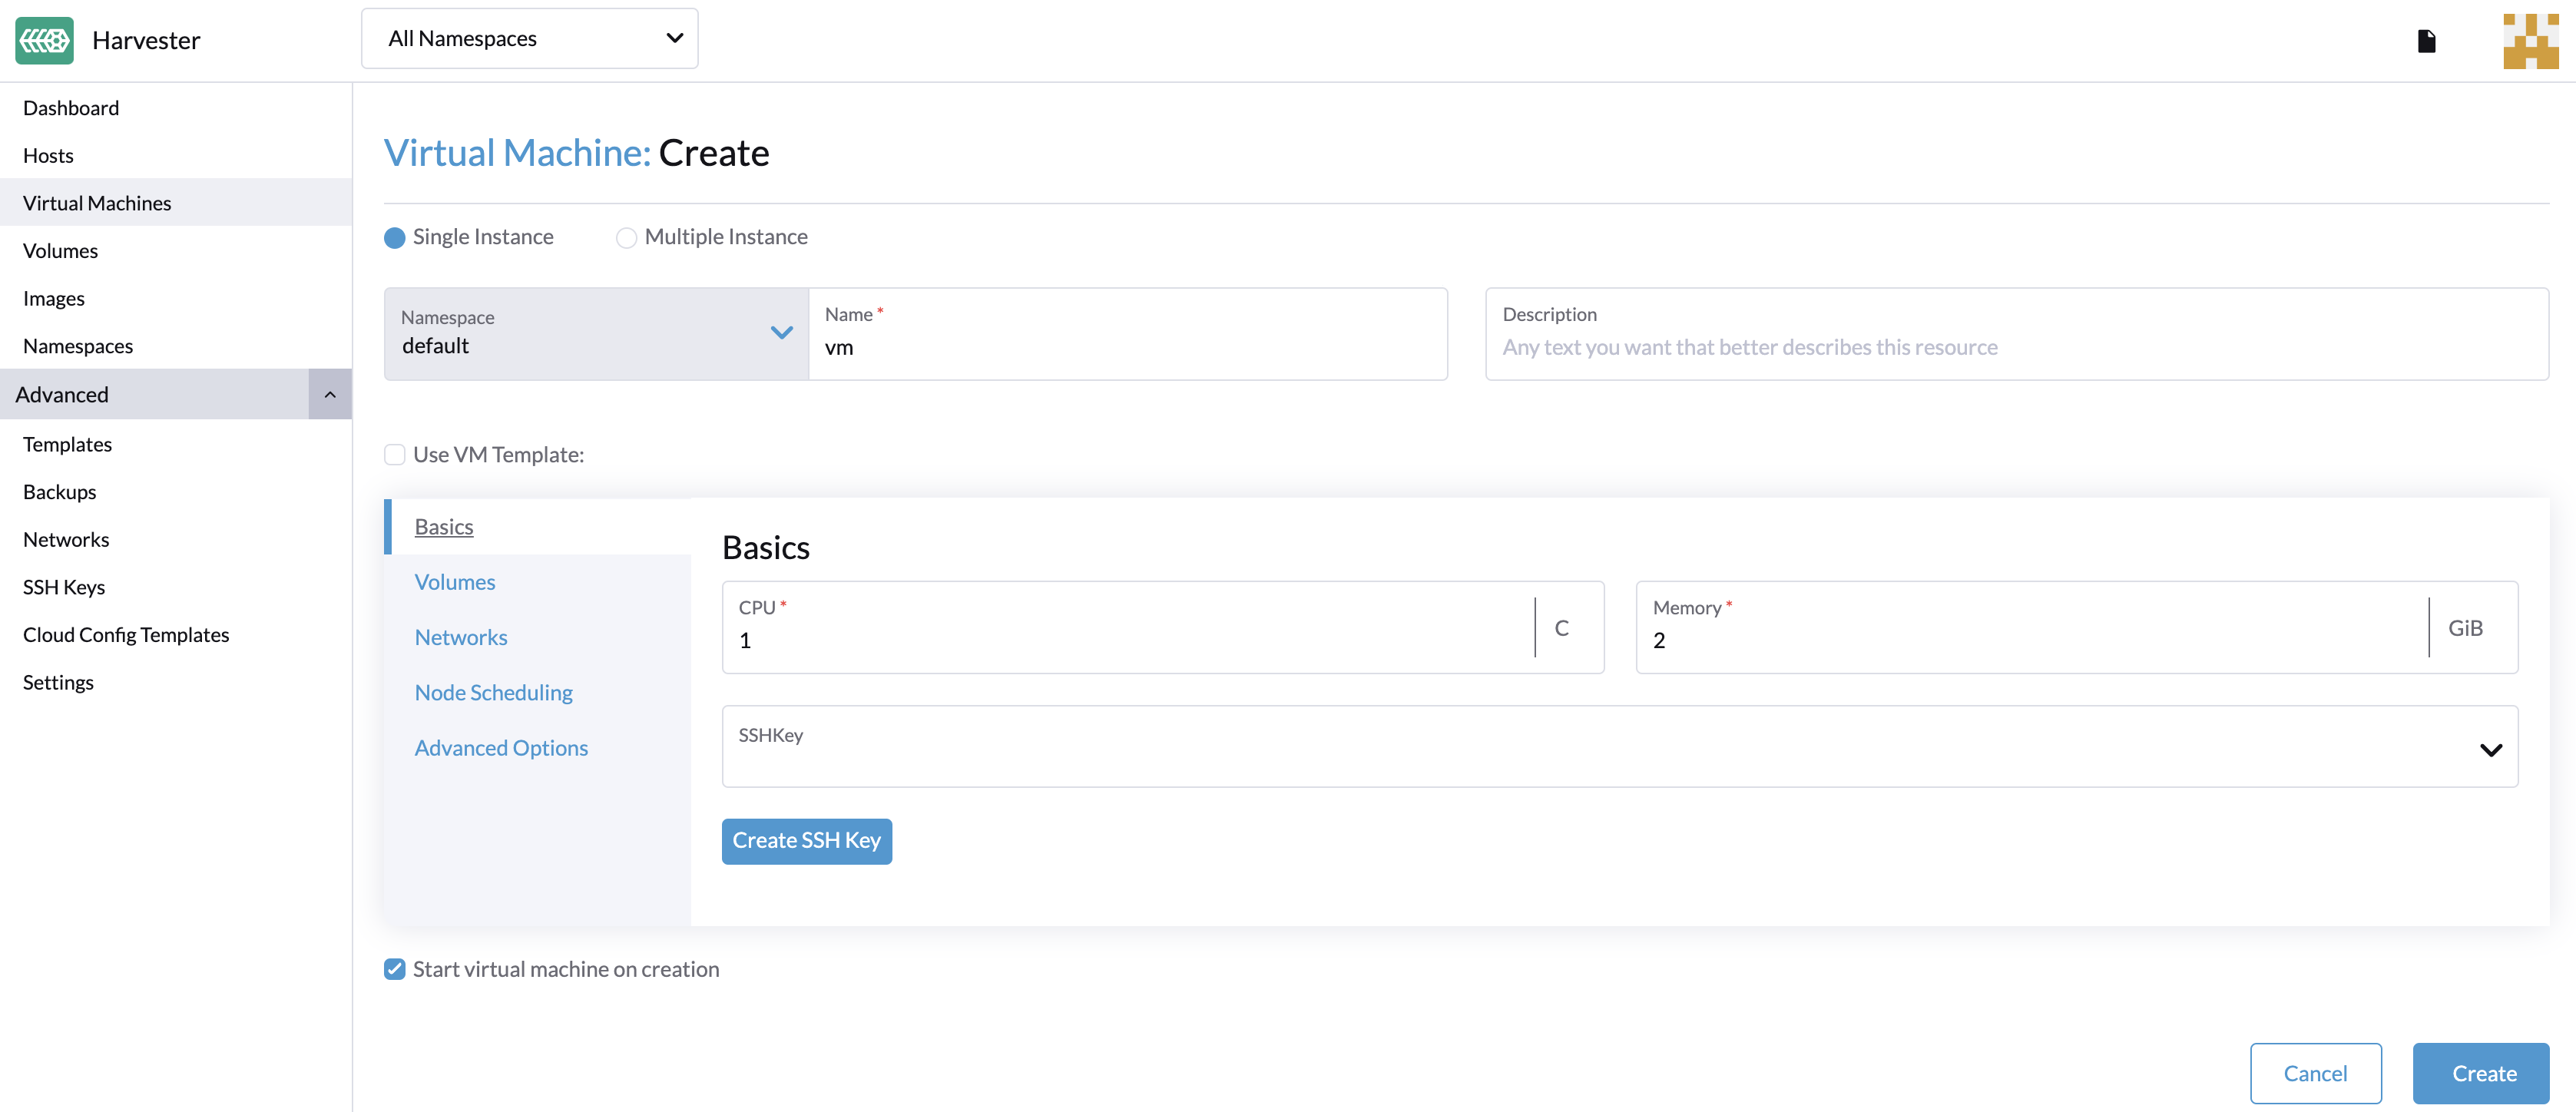
According to the Harvester site, “Harvester is an open-source hyper-converged infrastructure (HCI) software built on Kubernetes. It is an open alternative to using a proprietary HCI stack that incorporates the design and ethos of Cloud Native Computing.”
Harvester looks really nice. I will definitely give it a try.
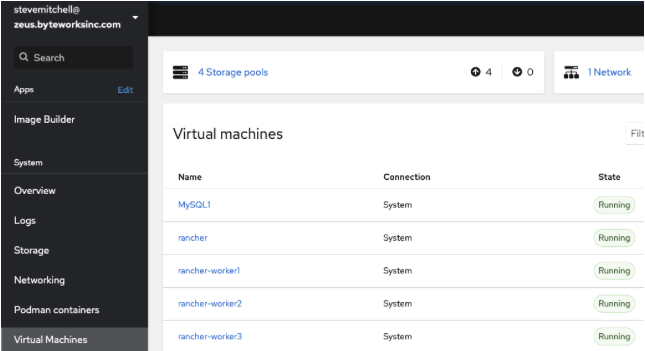
I wasn’t aware of Harvester when I originally imaged my “new” lab workstation, so I went with Centos and Cockpit. It used a bridged network, so all my physical and virtual machines shared the same subnet. Here is how it looked with the Cockpit GUI.
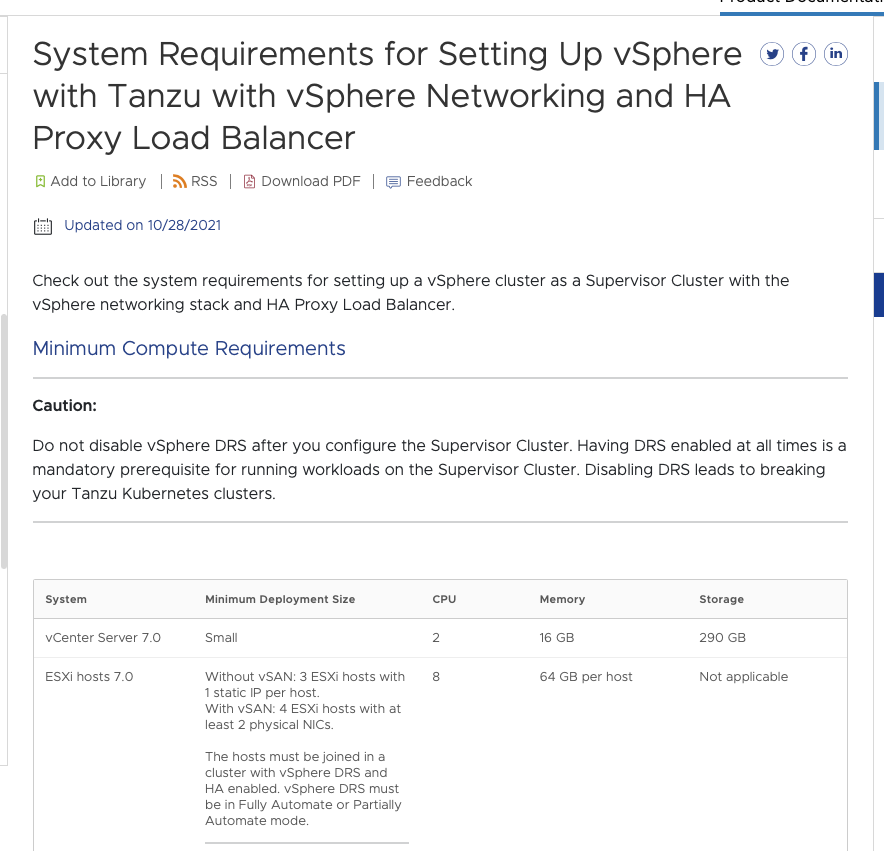
Many of my employer’s customers are VMware customers too, so it is in my best interest to buy the VMUG Advantage membership and install vCenter. That takes a lot more work than KVM, but I hope it is worth it in the long run. The only caveat is that Tanzu on vSphere (specifically HAProxy for Tanzu) requires three ESXi hosts with 8-cores and 64 GB RAM. Yikes!
I’ll close with a screenshot of what made me realize that Tanzu is going to jack-up the cost of my home lab. I’ll post an update when Tanzu is up and running.